
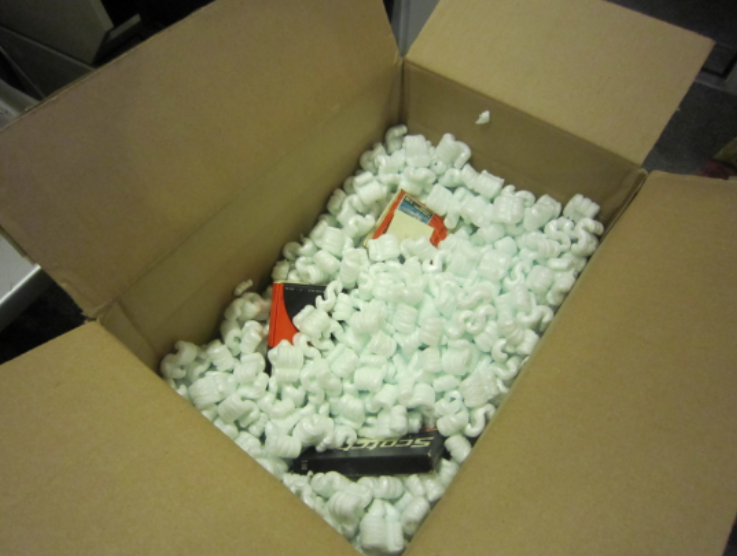
Don't be fooled: this is NOT proper packing!
It can be so frustrating to open a package only to find damaged materials and an awful mess inside. Even if the intention is to keep objects safe, sometimes packing can go off the rails and make headaches for everyone. Packing properly not only reduces the risk of materials being damaged in transit, it can also help make the digitization process run smoothly and efficiently. By following these guidelines, you will be able to pack up your materials in a way that reduces waste and encourages organization.
Before packing away materials, be sure that items are in the same order as your metadata sheet. When materials are in order, the check-in process is easier and we can get a jump on digitizing your materials rather than spending time putting materials in order. We know you have spent a lot of time getting the metadata sheet together, and we want to honor that by making sure everything is in its right place.
Just like they tell us on Schoolhouse Rock, three is a magic number. When you pack up your materials, you are looking for three key elements: primary housing, the secondary box, and the outer box. Primary housing refers to the object’s sleeve, jacket, or case. These materials are designed specifically to keep that media safe, so make sure you are sending that. Next comes the secondary housing; secondary housing simply refers to the box that may hold multiple cassettes or disks in one box. The secondary housing keeps materials from getting jostled around like they would if you simply put materials in their primary housing in a large box. So after you have put your materials into its secondary housing, it is time to put it into an outer box. This is simply the shipping box that we will receive when you send your materials.
Perhaps more importantly than what you should do in packing is what you should not do. We have received shipments that not only complicate how we run our workflows, they also have the potential or have actually damaged materials. Here is a list of potential pitfalls that you should look out for when packing
ARE YOU USING BUBBLE WRAP? PACKING PAPER? FOAM?
When packing materials, you should use bubble wrap, packing paper, or foam around the secondary housing to keep them safe and secure in the outer box; bubble wrap can also insulate the materials to protect them from environmental conditions like humidity or temperature. Do not use packing peanuts, they contribute to the mess and don’t keep your materials safe!
IS YOUR BOX AN APPROPRIATE SIZE?
In true Goldilocks fashion, boxes can either be way too big or way too small. When you are packing your materials, you want to make sure that the boxes in their secondary housing and outer box are just right. Choosing a box that is too large or too small could lead to materials being damaged in transit, and it also takes up too much physical space in our offices. Appropriate boxes can be found through Hollinger Metal Edge, University Products, and Gaylord.
HOW ARE YOUR OBJECTS LAYING IN THE BOX?
Are your objects laying flat in the box? Well get them out of there! When you lay objects flat on top of each other, they could experience excessive and damaging pressure. Instead, put materials on their edge rather than laying flat in the box. Not only is this a safety measure, it also keeps materials organized in a way that makes the check-in process go much more smoothly. The only exception to this is film. A good rule of thumb: make sure your boxes weigh only about 30 pounds!
At the end of the day, we as archivists are all looking for the same thing: to keep objects safe in transit and see them through to the end of the digitization process. By following through on this first step in the workflow, we can ensure that we meet this goal all together.